
Hey all! There’s been a push recently to put up lists for new players to jump in with or reference when building their own, and I figured I’d be remiss if I didn’t throw my IG list in the mix. It’s my go-to whenever I don’t want to think too hard and I just wanna throw dice. It is still Imperial Assault, so there will be plenty of difficult decisions and room for expert play, but the list revolves around 2 key figures, which allows you to focus your attention.
- Deployments:
- IG-88 [12]
- IG-11 (IACP) [9]
- Zuckuss (IACP) [6]
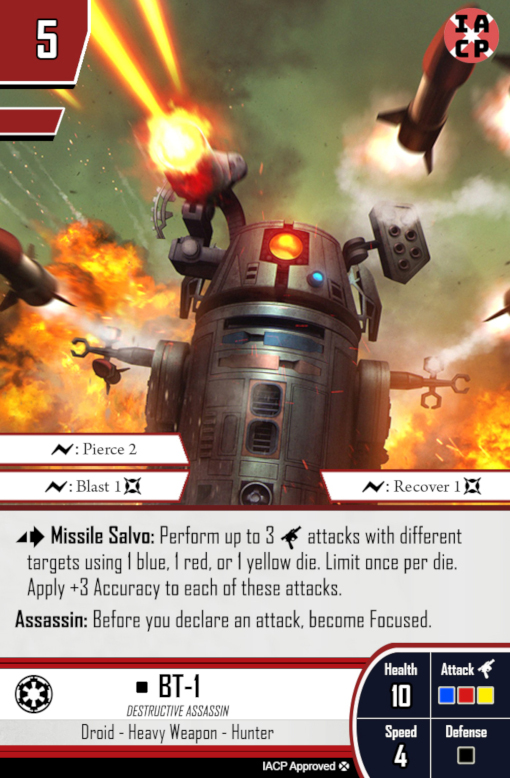
- BT-1 (IACP) [5]
- Jawa Scavenger [Elite] [3]
- R2-D2 [3]
- Clan of Two (IACP) [1]
- Extra Armor [1]
- Focused on the Kill [0]
Commands:
- Assassinate (IACP) [3]
- Blaze of Glory [2]
- Heightened Reflexes [2]
- Repair (IACP) [2]
- Repair (IACP) [2]
- Field Tactician [1]
- Glory of the Kill [1]
- Negation [1]
- Rapid Recalibration (IACP) [1]
- Element of Surprise [0]
- Findsman Meditation (IACP) [0]
- Opportunistic [0]
- Planning [0]
- Take Initiative [0]
- Wild Attack [0]
The key to playing this list well is getting the most out of the IG double attacks as possible. IG-88 gets two free movement points from his personal “Focused on the Kill” attachment, and IG-11 can move and still attack twice in one turn. Both of these figures hit very hard, and you can expect enemy ranged figures to hang back instead of engaging them head-on. It’s important not to overextend when trying to catch them. On the other hand, melee figures will likely rush you as fast as possible to prevent them from getting their attacks off. Most melee figures like to boost their movement through command cards, so be wary of cards like “Force Rush” and “Urgency” that can bring them closer than you expected.

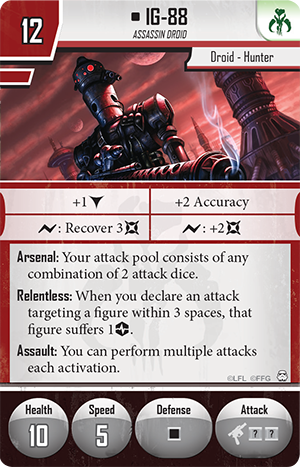

There is a constant battle between keeping the IGs far enough forward to get their double attacks, but not exposing them and getting them killed. So many of your points are tied up in them that once they’re dead, the list can really struggle to put out enough damage. IG-88 is especially strong from close range, where he can roll 2 red dice and tack on a strain from Relentless, but it’s important to remember that IG-88 is usually going to be more valuable than the unit you’re attacking. Consider attacking once and backing off if the double attack will leave you exposed. Zuckuss and BT-1 are both great at finishing figures off, so you can use them to chase down a survivor if need be.

Speaking of Zuckuss and BT-1, they are your backup attackers. They can clean up anything that survives an IG attack, or cut off alternate angles that your opponent might try to walk down. Remember to make use of Zuckuss’ Shared Calculations ability by keeping him in range of your droids. It’s especially important when facing an opponent who has white die defenders, as it can mitigate the powerful dodge rolls that will otherwise ruin your day.
For BT-1, note that his Assassin ability will cause him to become Focused before all 3 Missile Salvo attacks, making them much better than they seem at first glance. His regular attack is some pretty good single target damage though, so you’ll have to decide which one to use on a case-by-case basis. Again, the key to using him is to not overextend. He has a shorter range than IG-11 and Zuckuss, with 4-5 being optimal. This makes it tempting to charge him into the open, but at 10 health and no extra defense he’s likely to die in just two attacks.
Finally, we have our support cards. This list was originally born out of a desire to test how well a list could function without the usual support cards like Jabba the Hutt or Bib Fortuna. You’ll notice that nearly all of our attackers focus themselves, so they don’t need help from our usual crime lords. That being said, the extra card draw from Jabba and Black Market was sorely missed. We also had no real way to claim objectives originally. Enter the Jawa Scavenger and his pal, R2-D2.

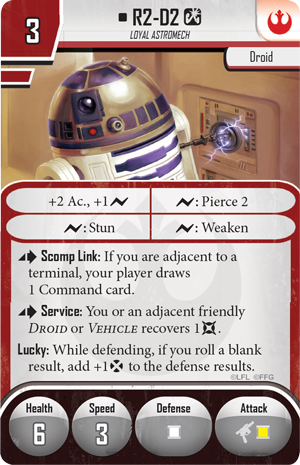
The Jawa Scavenger is great at filling out the last few points in a list, as he can run around claiming objectives, and he has the Leader trait to use with Planning. He also allows us to take R2-D2, who we borrow from the standard group of Rebel support cards to fix our card draw issues. R2’s job is to sit on the terminal and Scomp Link all game. It doesn’t seem like that important of a job until you try playing a game without him. He’s the glue that makes our list work, as we are fairly reliant on drawing some of our more powerful command cards by turn 2. More on those later.
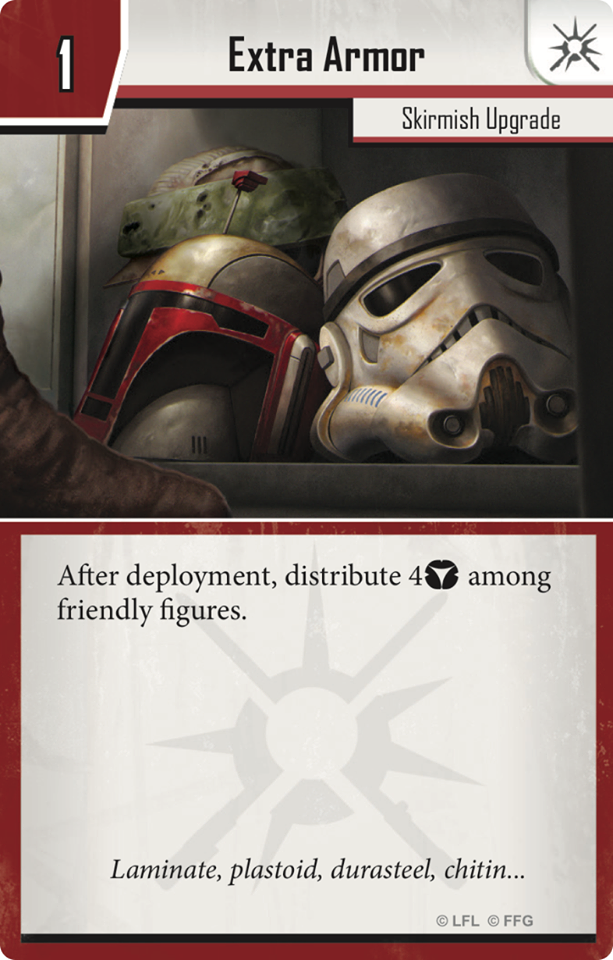
We have two points leftover, which gives us room to grab Extra Armor and Clan of Two. Extra Armor is pretty self-explanatory, we put two armor tokens on each of the IG units to keep them alive longer. It synergizes well with their innate +1 block and can force the opponent to dump all their command cards if they want to take one down. Condition removal is very important in any list built around expensive centerpiece figures, and Clan of Two can accomplish that for us. Remember to keep The Child behind your units so the opponent doesn’t just target him directly.
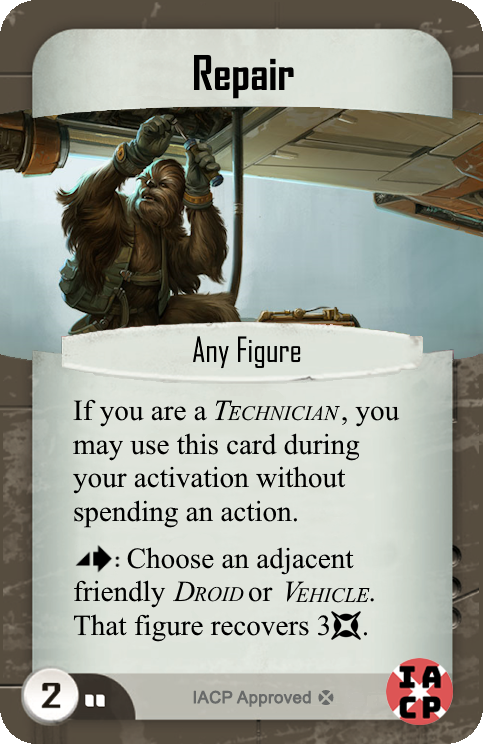

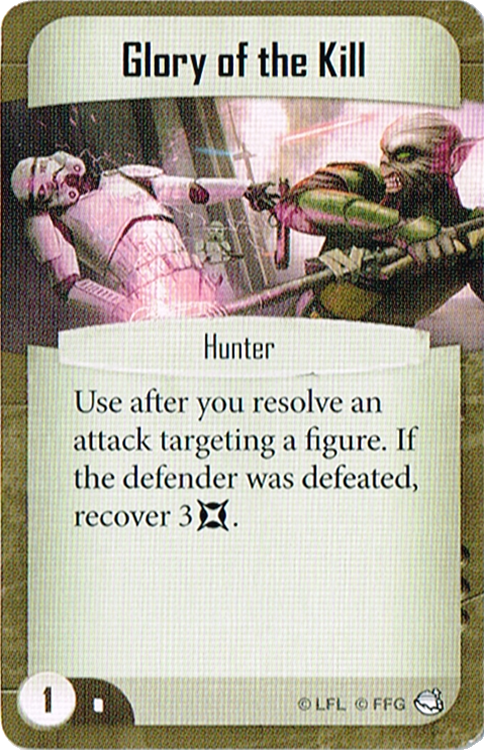
Looking now to our command deck, the two copies of Repair are the secret sauce. The Jawa Scavenger, R2-D2, and Zuckuss are all technicians. This means they can use Repair for free whenever they’re adjacent to an IG unit or BT-1. It can repair IG-88 before he potentially gets killed by Blaze of Glory at the end of a round, or just heal up one of your droids after they’ve taken a hit. Zuckuss will often be nearby to repair someone, but if need be the Jawa Scavenger can double move to reach a figure for repairs. Glory of the Kill is also a great way to keep your figures in the fight, although keep in mind that IG-11 is not a hunter and cannot use this.
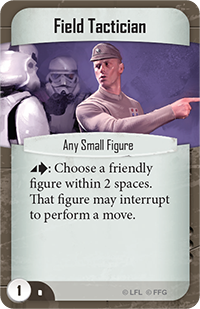
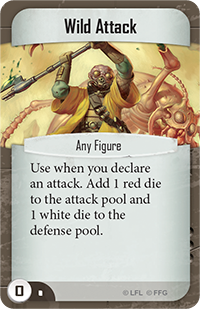
Field Tactician has insane synergy with Clan of Two. The Child counts as a small figure who can play Field Tactician at the start (or end) of IG-11’s turn to really boost a figure’s movement. If used to give IG-11 an extra move, he can move a whopping 8 spaces and still attack twice. That gives him a ton of reach, and often allows him to step back into relative safety afterwards. Meanwhile, Wild Attack is here for its synergy with Zuckuss, as he can re-roll enemy dodges with Shared Calculations.
Movement and positioning is going to be key to playing this list well, as it is with pretty much every list in Imperial Assault. Don’t overextend your attackers, instead use the Jawa Scavenger, Zuckuss, and BT-1 to start grabbing objectives if your opponent decides to turtle.
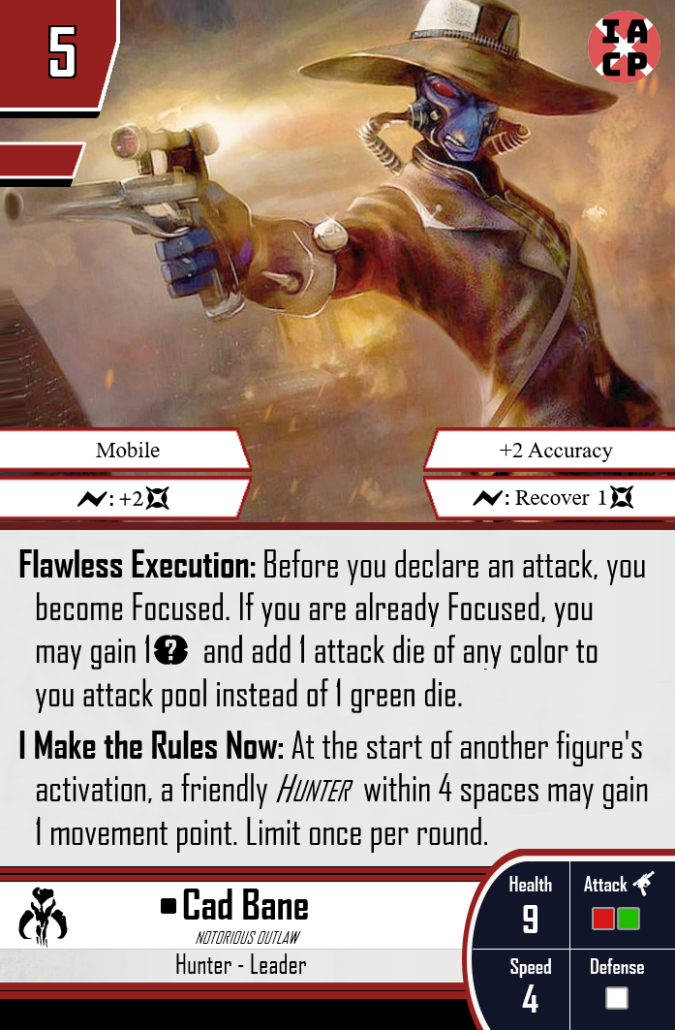
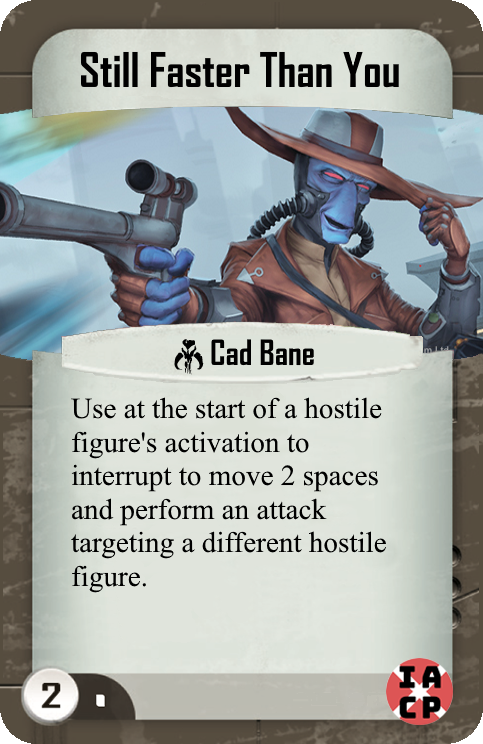
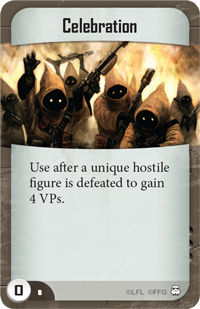
Cad Bane is also an option that can help a lot in the movement department with his ability I Make the Rules Now to give BT-1 and IG-88 significantly more threat projection or save them from a positioning error. Just remember to time it right, as you cannot use it at the start of Cad Bane’s own activation. If you decide to run him, I’d replace Zuckuss and one copy of Repair in order to add Bane’s unique command card Still Faster Than You. Remove Findsman Meditation for Celebration as well.
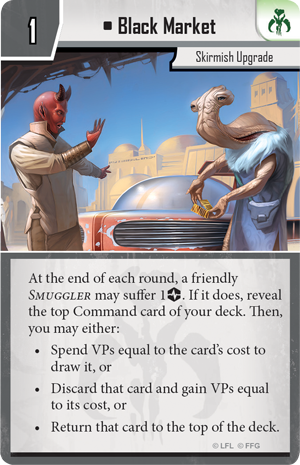
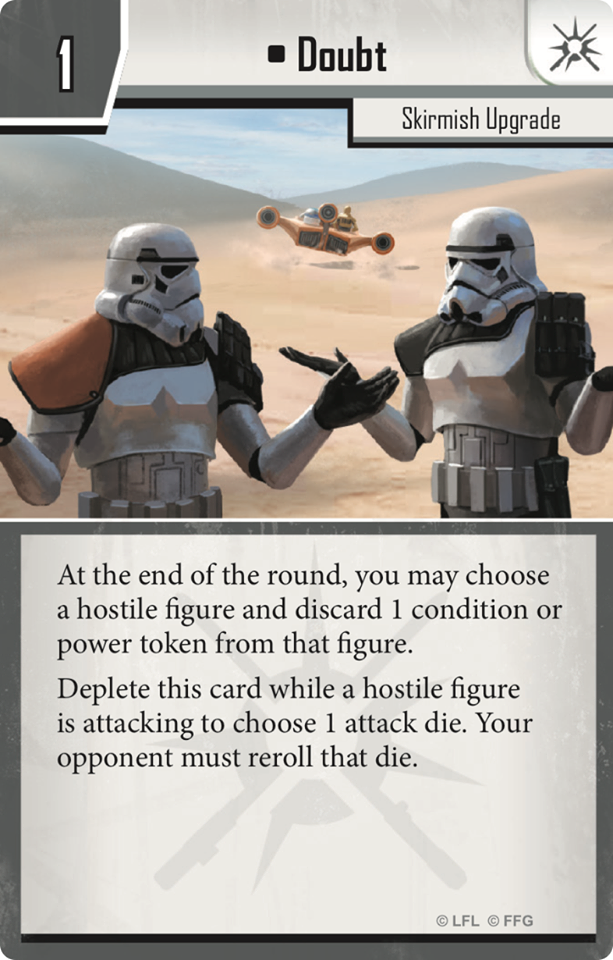
You can throw in Black Market to fill in the extra point and put the strain damage on the Jawa Scavenger each turn, who should hopefully be staying out of the line of fire anyways for most of the match. If you’d like to play aggressively with the Jawa, you can add in Doubt or another copy of Extra Armor instead.
The last two paragraphs are just talking about generically good command cards, so feel free to skip them if you’re already familiar. Good luck with your matches, and feel free to ping me @pon3d on the IACP Discord server if you end up playing the list! I’d love to hear how it went.
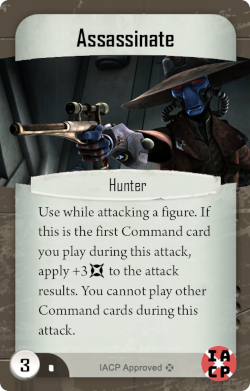

Now onto the rest of the command cards. First thing’s first: if you’re playing Hunters, you’re playing Assassinate. This card is what makes the archetype so feared. A large part of the reason it is so good is the phrase “Use while attacking.” Whenever you see this on a command card, it means that card gets played after dice are rolled and re-rolled, but before surge abilities are chosen. You can see whether or not your attack will kill without the extra help, then choose to use it if you need to. The same goes for Heightened Reflexes, letting you use it whenever your opponent rolls well on their defense die. Note that you cannot use them both together though, because of Assassinate’s final clause.
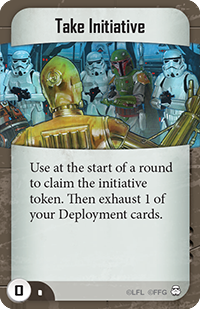
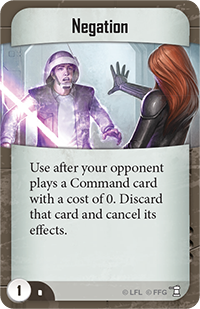
Take Initiative is one of the most powerful cards in the game at just 0 points. It’s downside is not as bad as it seems, because most lists will have a cheap support figure they can exhaust without worrying too much. It’s upside however allows you to either make or interrupt one of the most powerful plays in the game. It’s the reason most lists try to get 7 deployments. That play is the end-of-round activation, start-of-round activation. If you have the final activation in a round and you know you will get initiative next round, you can run a figure into the open and make an attack, then make another attack at the start of the next round and still get to safety before your opponent has a chance to respond. The threat of this alone will force your opponent to hang way back if he knows it’s coming. In fact, Take Initiative is such a strong card that it makes Negation one of the stronger command cards as well just for being able to counter it.